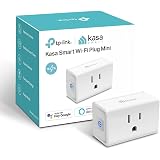
Have you ever wondered how easy it is to transform your ordinary home into a smart home? The journey often begins with simple, yet incredibly powerful devices like a smart plug. While the video above provides a fantastic visual guide, let’s dive deeper into the process of setting up and connecting your new TP-Link Kasa Smart Plug, ensuring you understand every step and can troubleshoot any potential hiccups along the way. Preparing for a seamless integration of smart devices into your home environment is simpler than you might think.
Understanding Your TP-Link Kasa Smart Plug
Before we jump into the setup, it’s helpful to know what makes a TP-Link Kasa Smart Plug an excellent addition to your home automation system. These smart plugs allow you to control any connected device remotely using the Kasa Smart app on your smartphone or even with voice commands through compatible smart assistants like Amazon Alexa or Google Assistant. Imagine turning off your outdoor lights from your bed or scheduling your coffee maker to brew every morning before you wake up!
Kasa Smart Plugs come in various models, such as the Smart Plug Lite Mini shown in the video, but the core setup process remains largely consistent. They are designed for user-friendliness, making them ideal for anyone looking to dip their toes into smart home technology. Their reliability and robust app features make them a popular choice for beginners and experienced users alike.
Initial Setup: Getting Your Smart Plug Ready
The first step in connecting your TP-Link Kasa Smart Plug is straightforward and crucial. Simply unbox your new smart plug and plug it into any standard electrical outlet. Make sure the outlet is functioning correctly and provides consistent power. This initial physical connection is the foundation for all subsequent digital configurations.
Once plugged in, direct your attention to the indicator light on the smart plug itself. This light is your primary visual cue during the setup process. Initially, it might be solid or off, but for successful setup, you need to wait for it to start blinking a specific pattern. As shown in the video, the light should alternate between blue and red. This blinking pattern signifies that the device is in setup mode and actively broadcasting its Wi-Fi signal, ready to be discovered by your Kasa Smart app.
Navigating the Kasa Smart App for Device Discovery
With your TP-Link Kasa Smart Plug powered on and blinking, the next phase involves your smartphone and the Kasa Smart app. If you haven’t already, download the Kasa Smart app from your device’s app store (available for both iOS and Android). Create an account or log in if you’re a returning user. This app acts as the central hub for managing all your Kasa devices.
Once inside the app and on the home page, you’ll need to initiate the device discovery process. Look for a plus sign (+) icon, typically located in the upper right-hand corner of the screen. Tapping this icon opens a menu where you can add various Kasa devices. From this list, select “Device,” then navigate to “Smart Plugs,” and finally choose your specific smart plug model. The video specifically shows selecting “Smart Plug Lite Mini,” but ensure you pick the model that matches your device for accurate setup.
Connecting Your Kasa Smart Plug to Your Home Wi-Fi Network
After selecting your smart plug model in the app, you’ll be prompted to confirm that it’s plugged in and that its Wi-Fi light is blinking blue and red, just as we discussed. Confirm these conditions, and the app will guide you to the next critical step: connecting the smart plug to your home Wi-Fi network. This is where the magic of remote control truly begins.
The video demonstrates the process for an iPhone. You’ll need to temporarily leave the Kasa app to connect your phone directly to the smart plug’s temporary Wi-Fi signal. On an iPhone, swipe down to access the Control Center, then press and hold the Wi-Fi icon. This action reveals available Wi-Fi networks. Look for a network named ‘TP-Link_’ followed by some characters. Select this network to establish a direct connection between your phone and the smart plug. However, if you are using an Android device, you’ll typically navigate to your phone’s Wi-Fi settings via the main Settings menu to find and connect to the TP-Link network.
Once your phone indicates it’s connected to the TP-Link network, return to the Kasa Smart app. The app should now recognize that it’s connected to the plug. The next prompt will ask you to select your home’s main Wi-Fi network (the one you want the smart plug to use) and enter its password. This step is crucial; the smart plug needs to join your regular home network to receive commands and connect to the internet. Enter your password carefully and tap “Join” or “Next.” The smart plug will then work to establish its connection, and you’ll see confirmation once it’s successfully integrated.
Troubleshooting Wi-Fi Connection Issues
Sometimes, the smart plug might struggle to connect to your Wi-Fi. This can happen for several reasons. First, ensure your Wi-Fi network is 2.4 GHz, as most Kasa Smart Plugs do not support 5 GHz networks. Second, check your Wi-Fi password for accuracy. Typos are a common culprit. Finally, try moving the smart plug closer to your Wi-Fi router during setup. Obstacles like thick walls or other electronics can interfere with the signal, especially during the initial pairing process. A simple reset of the smart plug (holding down the power button for a few seconds) can often resolve minor connectivity issues.
Personalizing Your Kasa Smart Plug for Easier Management
After successfully connecting your TP-Link Kasa Smart Plug to Wi-Fi, the Kasa app will prompt you to personalize it. This step is more important than it might seem for an efficient smart home setup. First, you’ll name the device. As the video shows, ‘Outdoor Lights’ is a great example, especially if you have multiple smart plugs. Adding ‘1’ or ‘2’ helps distinguish them. A clear, descriptive name makes it easy to identify and control your device, particularly when using voice commands.
Beyond naming, you can assign an icon to your smart plug (e.g., a lamp icon for lights, a coffee cup for a coffee maker). This visual cue further aids quick identification within the app. Lastly, the app allows you to specify its location within your home, such as ‘Living Room,’ ‘Kitchen,’ or ‘Outdoor.’ Grouping devices by location simplifies control and organization, especially as your smart home grows. These personalization steps truly streamline your daily interactions with your Kasa Smart Plug.
Testing Your Smart Plug: Confirmation of Control
With all setup steps complete, the final, satisfying action is to test your new TP-Link Kasa Smart Plug. The Kasa app will usually present a toggle switch or a button directly after setup, allowing you to turn the power on and off. As demonstrated in the video, observe the light connected to your smart plug (or the smart plug’s own indicator light) to confirm it responds to your commands. Toggle the power off, and the connected device should power down; toggle it on, and it should light up or activate. This simple test confirms that your smart plug is fully connected and ready for action, putting instant control at your fingertips.
Now that your Kasa Smart Plug is operational, you can explore the app’s features further. Set schedules for devices, create scenes for multiple devices to activate simultaneously, or integrate with voice assistants for hands-free control. Enjoy the newfound convenience and efficiency that smart home automation brings to your everyday life!
Plugging In for Answers: Your TP-Link / Kasa Smart Plug Q&A
What is a TP-Link Kasa Smart Plug?
A TP-Link Kasa Smart Plug allows you to remotely control any connected device using a smartphone app or voice commands. It helps transform ordinary appliances into smart home devices.
How do I start the physical setup of my Kasa Smart Plug?
First, unbox your smart plug and plug it into any standard electrical outlet. Wait for its indicator light to start blinking blue and red, which signifies it’s in setup mode.
What app do I need to set up and control my Kasa Smart Plug?
You need to download the Kasa Smart app from your device’s app store. This app serves as the central hub for discovering, setting up, and managing all your Kasa smart devices.
How do I connect my Kasa Smart Plug to my home Wi-Fi network?
After starting the setup in the Kasa app, you’ll temporarily connect your phone directly to the smart plug’s Wi-Fi signal. Then, within the app, you’ll select your main home Wi-Fi network and enter its password for the plug to join.
Why should I name my Kasa Smart Plug after setting it up?
Naming your smart plug with a clear, descriptive name (like ‘Outdoor Lights’) makes it much easier to identify and control, especially when using voice commands or managing multiple devices within the Kasa app.